Learning how to add products to Amazon store can feel overwhelming with multiple listing options and technical requirements. Megaficus simplifies the process by explaining when to join existing listings versus creating new ones, plus bulk upload methods that save time and prevent common rejection errors.
Quick Summary
- What to prepare before you start: Check category approval requirements, understand ASINs, and gather essential documentation (business license, UPC barcodes, product images, specifications).
- Adding products to existing listings: Search for the product’s ASIN in Catalog, select item condition, configure offer details (price, fulfillment method, SKU), then save to activate listing.
- Creating new listings for unique products: Select “Product not sold on Amazon”, choose appropriate category, complete all product details, including GS1-verified UPC, then publish.
- Common mistakes to avoid: Don’t submit listings with typos, incomplete product information, missing keyword optimization, or manage prices manually without automation tools.
What To Prepare Before You Start Adding Products?
Before adding products to Amazon, you need to prepare several key elements to avoid listing delays and errors.
Category Approval Status
Amazon restricts selling permissions for certain product categories to maintain marketplace quality. Categories such as Jewelry, Grocery & Gourmet Foods, Automotive Parts, and Collectibles require you to obtain approval before you can start selling. To secure this authorization, you must submit specific documentation:
- Business license and tax ID
- Product invoices from authorized suppliers
- Brand authorization letters (for branded items)
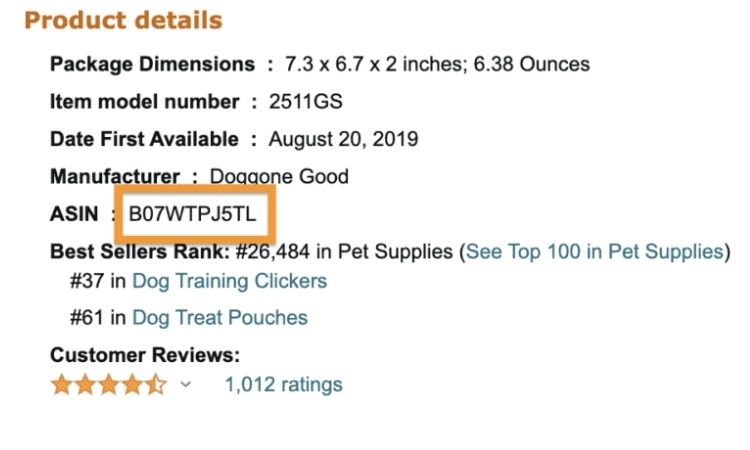
Understanding ASINs (Amazon Standard Identification Numbers)
Each product on Amazon is identified by a unique 10-character code called an ASIN. When you prepare to list a product, you should first search Amazon’s catalog to determine if an ASIN already exists for that item:
- If ASIN exists → add your offer to that listing
- If no ASIN → Amazon creates a new one for you
Product Information
You must gather comprehensive product details before starting the listing process:
- UPC/EAN barcodes (if creating new listings)
- High-quality product images
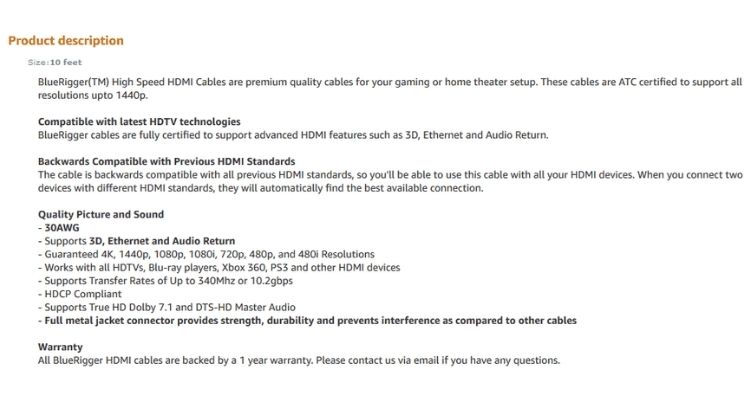
- Accurate product specifications and descriptions
- Pricing and inventory quantities
How To Add Products To An Existing Amazon Store?
When selling products already listed on Amazon, you join existing product pages rather than creating new ones. This streamlined approach requires matching the exact ASIN, UPC code, and product specifications precisely.
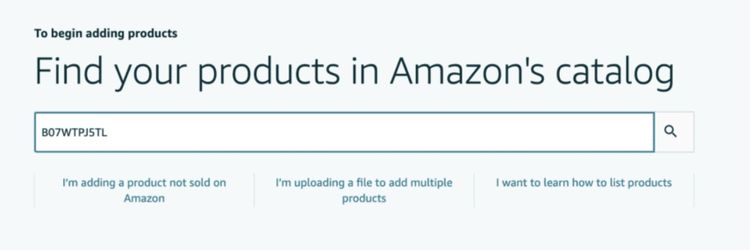
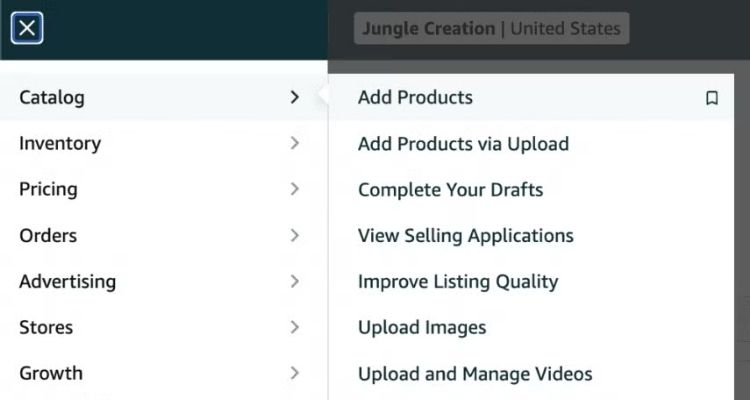
Step 1: Navigate to the Add Products Section and Search for Your ASIN
Navigate to your Seller Central dashboard and locate the “Catalog” section in the main menu. Once you’re in Catalog, click on the “Add Products” button to open the product search interface. Then, paste or type the ASIN you copied in the previous step into the search bar and hit enter to find the product.
Step 2: Select Your Item’s Condition and Proceed with Listing
After the product appears in the search results, Amazon will prompt you to specify the item’s condition. Select the appropriate condition from the available options (such as New, Used, Refurbished, etc.) based on your inventory. Once you’ve made your selection, click the “Sell this product” button to proceed to the listing details page.

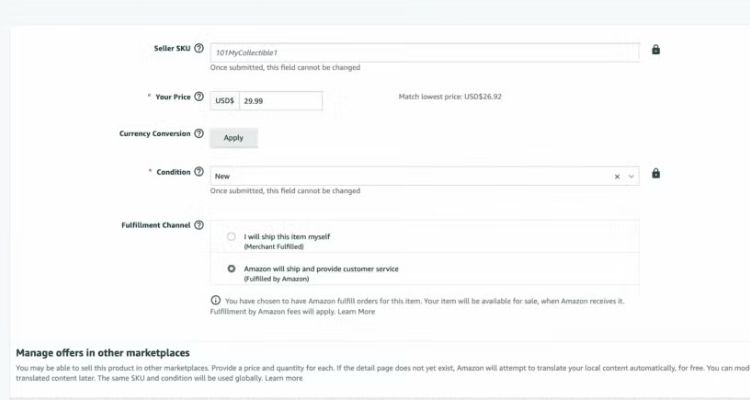
Step 3: Set Up Your Product Offer Details
At this stage, configure your offer by entering the required information:
- Standard Price: Input your selling price
- Offering Condition Type: Specify the item’s condition
- Fulfillment Channel: Choose between Merchant Fulfilled (FBM) or Fulfillment by Amazon (FBA)
If you select FBM, the system will prompt you to enter your available quantity. If you choose FBA, Amazon will redirect you to create a shipment.
You’ll also see the “Contribution SKU” field, which is a unique code to help you track inventory internally. For example, you can create an SKU like “DG_Pouch_01” for easy identification.
After completing all fields, you click “Save and finish” at the bottom. Your product will appear in the “Manage Inventory” section of Seller Central.
How To Set Up A New Listing For Unique Products?
When your product doesn’t exist in Amazon’s catalog yet, you’ll need to create an entirely new listing from scratch. Follow these steps to add a new product to the marketplace.
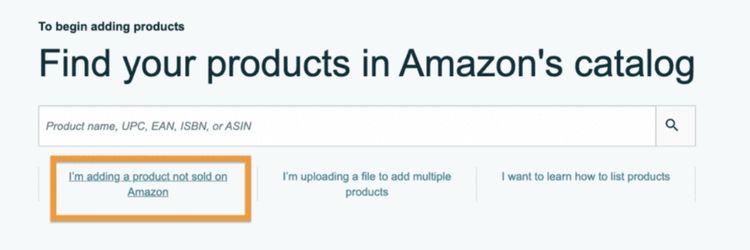
Step 1: Access the Product Addition Tool in Seller Central
Navigate to the “Add a product” section within your Seller Central dashboard. Once the page loads, locate and click on the option that says “I’m adding a product not sold on Amazon.” This action will take you to a new product creation form where you can build your listing from the ground up.
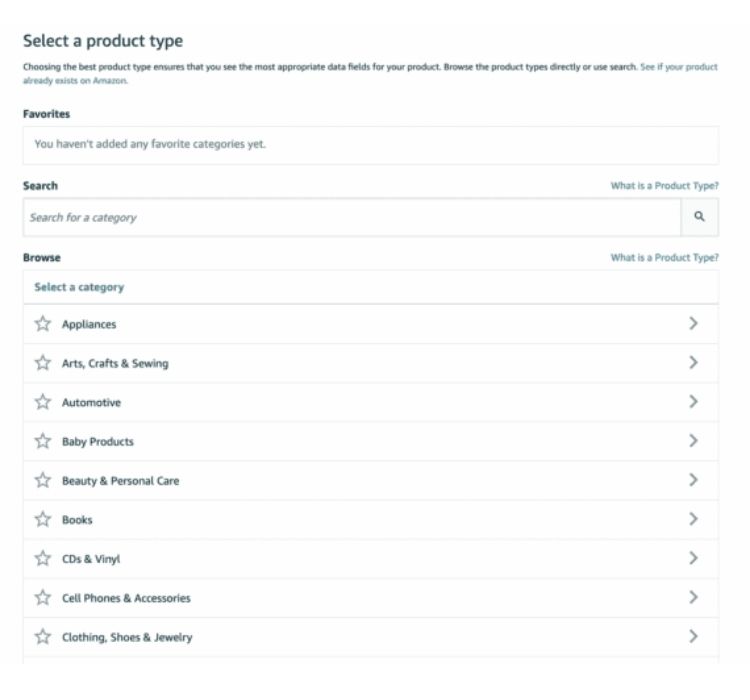
Step 2: Choose the Appropriate Category for Your Product
Amazon will display a list of available product categories for you to choose from. You need to select the category that most accurately represents your product type, as this decision determines where customers will discover your item when they browse the marketplace.
Additionally, the category you choose affects which product attributes and specific requirements Amazon will apply to your listing, so make sure to pick the most relevant option.
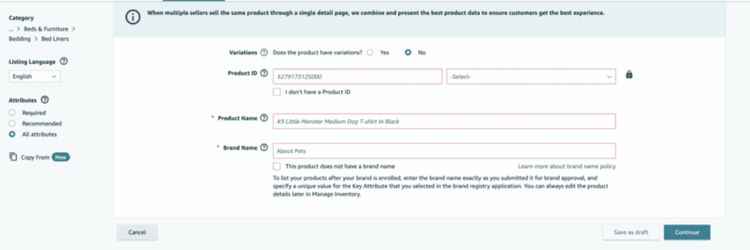
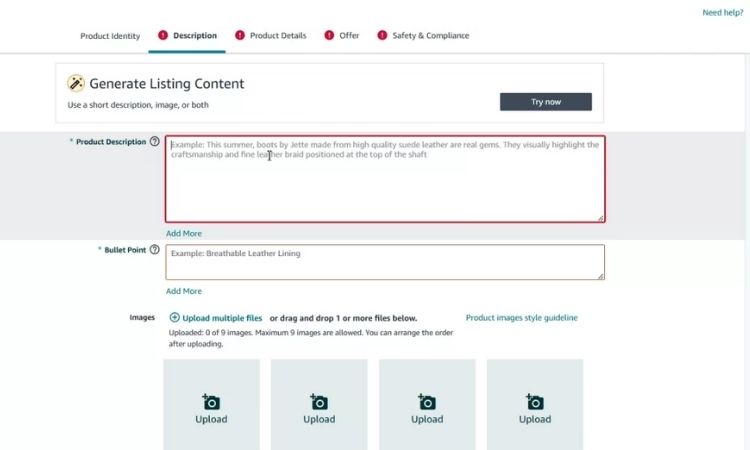
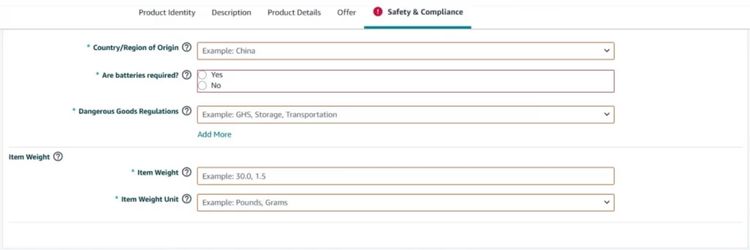
Step 3: Complete All Required Product Details
At this stage, you fill in all necessary product information, including:
- Product Name (title)
- Selling price
- Brand name and manufacturer
- Product ID (UPC/EAN barcode)
- Product images
- Fulfillment method
Important: When entering your UPC barcode, ensure you purchased it directly from GS1. Amazon verifies all UPCs with GS1’s database, so codes from unauthorized sellers will be rejected.
After completing all fields, you click “Save and finish” to publish your listing. Your product will then appear on Amazon’s marketplace.
How To Add Products In Bulk Using Upload Tools?
If you plan to list multiple products at once, using Amazon’s bulk upload feature with inventory spreadsheets can save significant time. However, this method requires strong spreadsheet skills and familiarity with Seller Central’s requirements.
Step 1: Access the Bulk Upload Section in Seller Central
Navigate to your Seller Central dashboard and locate the “Add products via upload” option. Click on it to enter the bulk listing interface.
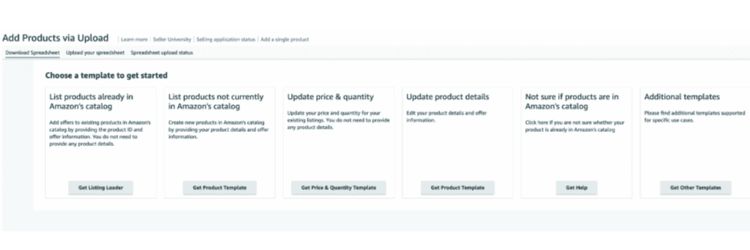
Step 2: Download Your Category-Specific Template
Amazon will guide you through their setup process. First, select the product category template you need from the available options. Then, choose which marketplace (e.g., US, UK, Canada) you’re listing products in. After making these selections, download the corresponding spreadsheet template to your computer.
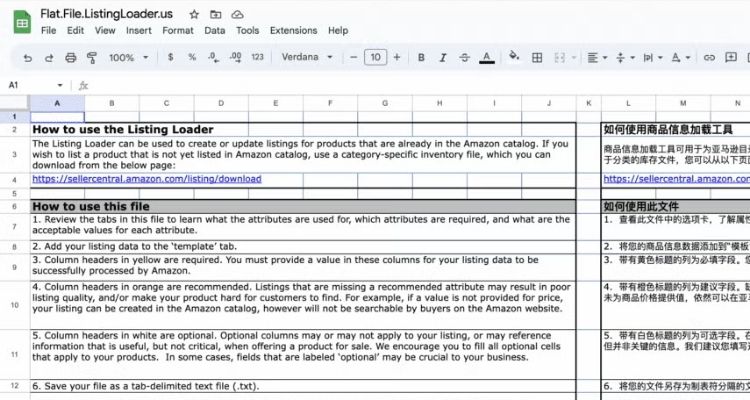
Step 3: Open and Review the Template Structure
Launch the downloaded file using Excel or Google Sheets. You’ll notice the spreadsheet contains multiple tabs at the bottom of the document, including:
- Instructions for completing each field
- Definitions of technical terms
- Example entries showing correct formatting
- The main template sheet where you’ll enter your data
Take time to read through Amazon’s instructions carefully. If you’re unsure how to fill specific columns, refer to Amazon’s example templates for guidance. The examples also demonstrate how to create parent-child listings for products with variations (like different sizes or colors).
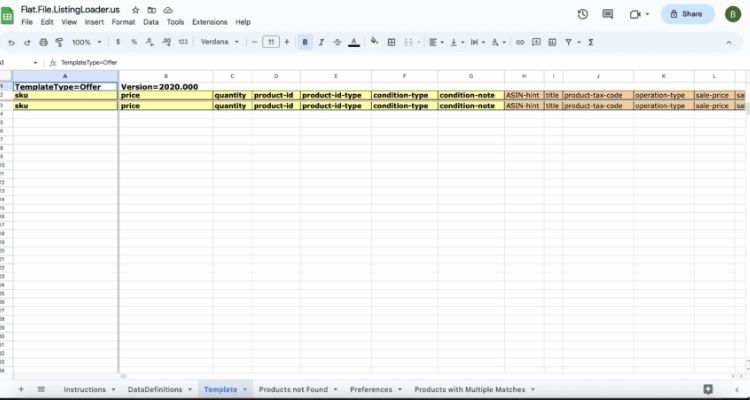
Step 4: Input Your Product Data into the Template
Fill in each required column with your product information, following the format shown in Amazon’s examples. Ensure all mandatory fields are completed accurately to avoid processing errors.
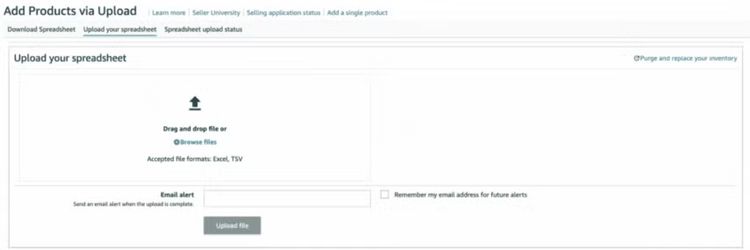
Step 5: Submit Your Completed File to Seller Central
After entering all your product data, save and download the completed spreadsheet. Return to the same section in Seller Central where you initially downloaded the template.
Look for the “Upload your inventory file” button at the top of the page and click it. Select your completed file to begin the upload process.
Amazon will process your spreadsheet, which may take some time depending on how many products you’re adding. You can provide your email address to receive a notification when processing is complete.
To track your upload progress, click on the “Spreadsheet upload status” tab in Seller Central. If Amazon detects any errors in your file, the system will display specific instructions on what needs to be corrected before resubmitting.
Common Mistakes When Adding Products?
Sellers commonly make preventable listing errors that cause rejections, inventory delays, and account restrictions when adding products to Amazon.
Mistake 1: Submitting Listings with Spelling and Grammar Errors
Many sellers rush through the listing creation process and fail to proofread their product titles and descriptions before publishing. As a result, typos, misspelled words, and grammatical mistakes appear in live listings, which makes your business look unprofessional and careless.
Moreover, these errors directly damage customer trust because buyers often question whether a seller who can’t write correctly will be reliable with order fulfillment and customer service.
Before clicking “Save and finish”, you take time to review your listing thoroughly:
- Read your product title, bullet points, and description multiple times
- Use grammar-checking tools like Grammarly to catch errors automatically
- Ask a colleague to review your content for a fresh perspective
- Consider professional copyediting services for high-value products
Mistake 2: Providing Inaccurate or Incomplete Product Information
Some sellers copy product details from manufacturer websites without verifying accuracy, or they leave out critical specifications like dimensions, weight, materials, or compatibility information. When customers receive products that don’t match the listing description, they become frustrated and leave negative reviews.
Additionally, missing specifications prevent customers from making informed purchase decisions, which leads them to choose competitors with more complete information instead.
To ensure accuracy and avoid customer complaints, you must verify all product information before publishing your listing:
- Physically measure and weigh your products to confirm accuracy
- Cross-reference specifications with manufacturer documentation
- Contact your supplier for clarification on any uncertain details
- Include comprehensive information: dimensions, weight, materials, colors, and compatibility
Mistake 3: Writing Descriptions Without Strategic Keyword Optimization
Sellers often write product descriptions based solely on what they think sounds good, completely ignoring how customers actually search for products on Amazon. Without incorporating relevant search terms, your listings remain invisible to potential buyers who would otherwise purchase your products.
Consequently, this mistake severely limits your product’s discoverability and results in lost sales opportunities, even if your product quality and pricing are excellent.
To improve your product’s visibility and attract the right customers, you should conduct thorough keyword research before writing your descriptions:
- Use Amazon’s search bar autocomplete to identify popular search terms
- Analyze competitor listings that rank well in your category
- Incorporate primary keywords naturally into your title, bullet points, and description
- Focus on terms describing features, benefits, and use cases customers search for
Mistake 4: Managing All Prices Manually Without Using Automation Tools
Manually adjusting prices for multiple products takes significant time and increases the risk of errors, particularly when you manage a large inventory. Additionally, you cannot monitor competitor prices continuously throughout the day, which means you often miss the best pricing opportunities.
As a result, your prices become outdated quickly, leading to lost sales when competitors offer better deals or reduced profits when you fail to capitalize on high-demand periods.
To maintain competitive prices without spending hours on manual updates, you should implement automated pricing tools:
- Use Amazon’s native repricing tools in Seller Central
- Consider third-party repricing software for advanced features
- Set minimum and maximum price boundaries to protect margins
- Configure automated rules based on your strategy (e.g., match the lowest FBA price, stay below Buy Box)
- Monitor performance weekly to ensure rules work correctly

>>> Read more: Learn Amazon Marketing Strategy to Grow Your Brand This Year
FAQs About How To Add Products To Amazon Store
No, adding products is free. You pay fees only when items sell: referral fees (8-15% per category), FBA fulfillment fees (if applicable), and either $39.99/month for Professional plans or $0.99 per sale for Individual plans.
For new listings, you need a UPC or EAN barcode from GS1. For existing listings, you only need the product’s ASIN. Brand-registered sellers may qualify for barcode exemptions in some categories.
FBM products go live within 15 minutes to a few hours. FBA products activate after Amazon receives and processes your inventory, typically 3-7 business days after shipment arrival.
No product limit exists, but new FBA sellers face inventory storage limits until they build sales history and performance metrics.
You can sell unbranded or your own products freely in most categories. Established brands require authorization. Restricted categories like Jewelry and Grocery need Amazon approval regardless of brand.
Get Professional Help from Megaficus
Knowing how to add products to Amazon store properly sets the foundation for selling success. The right listing method saves approval time, prevents errors, and gets your inventory live faster. Master these techniques to launch products confidently and start generating sales immediately.
Contact Megaficus today for expert help with Amazon listing setup and optimization strategies tailored to your business goals.